Tag Archives: easy

Easy Baked Chicken

Don’t be intimidated by chicken!  It’s so easy!

This recipe calls for chicken thighs – chicken thighs are cheap and actually a lot more tasty than a chicken breast!

You barely need any cooking skills for this recipe – if you can turn on the oven and use a timer, you can cook this chicken!

Here’s what you need to make Easy Baked Chicken:

  • 1 package of chicken thighs (5-6 thighs)
  • 1/3 cup of cooking oil (canola, sunflower, whatever you have)
  • Salt & pepper
  • Some dried herbs (parsley, rosemary, basil, oregano… anything like that)

 Here’s how to make it:

1.  Open the package of chicken.

Chicken breasts in their package

Chicken breasts in their package

2.  Pour the cooking oil over the chicken.  Do your best to spread the oil evenly on top of the chicken.  This oil coating will help the chicken skin get nice and crispy during cooking, and it also gives the seasonings something to stick to.

All shiny and coated with oil

All shiny and coated with oil

3.  Sprinkle the thighs liberally with salt and pepper.

All seasoned up!

All seasoned up!

4.  Sprinkle the thighs with your herbs.  I also add some sprinkles of hot chili pepper flakes because I like my food a little spicy!

Tasty!

Tasty!

5.  Transfer the thighs into a glass cooking pan.  Bake them in the oven at 400 degrees for 25 minutes.  Once the timer goes, gently cut into the biggest thigh and look in the middle of it.  If the meat is all white and cooked, you’re done!  If the meat is still pink, put it back in the oven for five more minutes.

All cooked up!

All cooked up!

That’s it, you’re done!  These are tasty little guys that require very little effort – serve them to company for a nice homestyle dinner.  I serve Little Cheesy Guys and some steamed broccoli with my Easy Baked Chicken!

Easy Baked Chicken with Little Cheesy Guys and some steamed broccoli

Easy Baked Chicken with Little Cheesy Guys and some steamed broccoli

Here’s how much it costs to make (6 thighs):

  • Chicken thighs:  $5.00
  • Cooking oil:  $0.50
  • Salt & pepper:  $0.05
  • Dried herbs:  $0.10

   Total cost to make:  $5.65

   Total cost per thigh:  $0.94

You can make this yourself – a tasty homestyle dish!

Here are some other easy meal ideas:

Lazy Quesadillas

A lazy quesadilla is a delicious quesadilla.

These take very little effort to make, and they taste just as good as any other quesadilla in the world.

If you can slice a brick of cheese, cut just a tiny bit of vegetables, and use your stovetop, you can make this!

Here’s what you need to make Lazy Quesadillas:

  • 4 slices of cheddar cheese from a brick
  • 4 slices of mozzarella cheese from a brick
  • A few pickled jalapenos
  • A few dices of onion
  • A few spoonfuls of salsa
  • 1 tortilla wrap

Here’s how to make one:

1.  Slice up the cheese and put it on a plate.

Slices of cheese

Slices of cheese

2.  Get some jalapenos out of the jar and put them on the plate beside the cheese.

Mmmmm

Mmmmm

3.  Dice up the onion and put it on the plate too.

So easy!

So easy!

4.  Put the tortilla on a pan on the stove on medium heat.  Put the tortilla on the pan like it is in the picture below:

The left half of the tortilla is in the centre of the pan

The left half of the tortilla is in the centre of the pan

5  Fan out half of your cheese slices onto the left side of the tortilla like in the picture below.

Cheese fanned out

Cheese fanned out

6.  Sprinkle some salsa over top.

Salsa sprinkled on top

Salsa sprinkled on top

7.  Sprinkle the jalapenos and onions on top of the cheese and salsa.

A nice spreading of veggies

A nice spreading of veggies\

8.  Top with the remaining slices of cheese.

Cheese on top

Cheese on top

9.  Fold the right side of the tortilla up over the left side.

Folded

Folded

10.  Let it cook for a couple of minutes and then flip it over.

Flipped over

Flipped over

11.  Let it cook for another few minutes and then flip it again.  Make sure both sides are nice and brown and toasty. In total it should only take about 5 or 6 minutes.

Yummy quesadilla!

Yummy quesadilla!

12.  Slide the quesadilla out of the pan and onto a cutting board.  Cut it into four equal pieces.

Cut up

Cut up

13.  Put them on a plate and enjoy!

Awesome quick snack!

Awesome quick snack!

Here’s what it costs to make a Lazy Quesadilla:

  • Cheddar cheese:  $0.50
  • Mozzarella cheese:  $0.50
  • Jalapenos:  $0.20
  • Onion:  $0.10
  • Salsa:  $0.35
  • Tortilla wrap:  $0.50

Total cost to make:  $2.15

Excellent!

  Check out some of these other lazy but tasty meal ideas:

Garlic Butter

Garlic butter.  Learn how to make it and enjoy a lifetime of tasty garlic bread, mashed potatoes, garlicky meatballs, bruschetta……

Garlic butter is awesome to have around.  If you want to jazz up any dinner you’re making, add in some garlic butter and enjoy!

Garlic butter is also pretty easy to make.  You can either use a garlic press to get your minced garlic or you can use a sharp knife to keep cutting that garlic up until it’s in the smallest pieces possible.

Here’s what you need to make it:

  • 1 cup of spreadable butter/margarine
  • 2 or 3 cloves of garlic, depending on how strong you like it
  • A tiny bit of water
  • A couple of sprinkles of parsley or oregano

Here’s how to make it:

1.  Put some spreadable butter/margarine into a reusable container.

Margarine

Margarine

2.  Mince up your garlic and add it to the butter.

Minced garlic added in

Minced garlic added in

3.  Add a few sprinkles of parsley or oregano.  This step is optional – I like to do it because it gives the garlic butter pretty green specks.  I sometimes add a bit of pepper, too.  Just because I really love pepper.

Oregano added in, along with a little bit of pepper

Oregano added in, along with a little bit of pepper

4.  Use a fork to mix it all up.

Mixing it up

Mixing it up

5.  Turn your water faucet on so it’s just dripping.  Add just a few drops of water into the garlic butter.  This will make it deliciously creamy.  If you add too much water, stir it up and then add some more margarine to thicken it back up.

Deliciously creamy!

Deliciously creamy!

Store your garlic butter in the fridge. Use it wherever and whenever you want!!

Total cost to make:

  • Butter/margarine:  $1.50
  • Garlic:  $0.50
  • Parsley/oregano:  $0.03

Total cost to make:  $2.03

Bows & Shells

This is a big-batch pasta recipe that you can make on your weekend and enjoy in your lunches at work all week!

It’s not hard to make – all you need to is cook chicken in the oven, cut veggies, cook pasta on the stove, and warm up a sauce.  None of these things requires a great deal of cooking skills!

Here’s what you need to make it:

  • 1/2 white onion
  • 1 red pepper
  • 1 green pepper
  • 2 cans of your favorite tomato sauce
  • 3 cloves of garlic
  • A chunk of mozzarella cheese
  • A chunk of cheddar cheese
  • 1 small can of diced tomatoes
  • 2 boneless skinless chicken breasts
  • 1 cup of small shell pasta
  • 2 cups of bowtie pasta

Here’s how to make it:

1.  Cook the bowtie pasta and the small shell pasta according to the directions on the package.  I cook them in the same pot, adding the bowties to the boiling water and then adding the shells about 4 minutes later.  Bowties take longer to cook.  Once the pasta is cooked, drain it and set it aside.

2.  Dice up all of the veggies and put them in a bowl.

A bowl of diced up veggies

A bowl of diced up veggies

3.  Open the can of tomato sauce and pour the contents into a saucepan on the stove.  Turn the stove on to medium-low heat.

Sauce on the stove

Sauce on the stove

4.  Mince up your garlic cloves and add them to the sauce on the stove.  Add a bunch of fresh-cracked black pepper too, if you like it!

Some cloves of garlic

Some cloves of garlic

All minced up!

All minced up!

Added into the delicious sauce

Added into the delicious sauce

5.  Add the can of diced tomatoes into the sauce.

Diced tomatoes added in

Diced tomatoes added in

6.  Let the sauce simmer while you grate the two cheese and mix them up in a bowl together.

Grating some mozzie

Grating some mozzie

Grating some cheddar

Grating some cheddar

7.  Turn the sauce down onto low heat.

8.  Cook the two chicken breasts.  I usually cook mine in the oven, but you can cook it however you like.  Just make sure that it’s fully cooked.  Then dice it up into medium-sized dices and add them to the tasty sauce.

Chicken added in...yum!

Chicken added in…yum!

9.  Now comes the time when you take a bit of what you’ve made and make yourself some dinner before you divide the rest of the batch into lunch portions for work.  Take a good handful of the pasta and put it in a saucepan to warm it up a bit.  Stir in some of the sauce and let it get all nice and hot.

A dinner-sized portion of the cooked pasta

A dinner-sized portion of the cooked pasta

Adding some tasty sauce

Adding some tasty sauce

All stirred up!

All stirred up!

10.  Transfer your dinner into a bowl and sprinkle it with some grated cheese.  It’s delicious!

Yum!

Yum!

11.  For your lunches at work, simply divide the rest of the cooked pasta into your reusable lunch containers.

All divided up

All divided up

12.  Divide up the sauce on top of the pasta.  Leave it all out on the counter until it’s cooled down, and then put the lids on the containers and put them all in the fridge.

Sauce on top

Sauce on top

13.  Divide up the rest of the mixed grated cheese into little ziploc bags and put them in the fridge.

Little bags of cheese

Little bags of cheese

14  In the morning, simply grab a container of the pasta and grab a bag of the cheese and you’re on your way to work!

Here’s how much it costs to make (6 servings):

  • Onion:  $0.30
  • Red pepper:  $1.00
  • Green pepper:  $0.80
  • Tomato sauce:  $3.00
  • Garlic:  $0.30
  • Mozzarella cheese:  $2.00
  • Cheddar cheese:  $2.00
  • Diced tomatoes:  $1.00
  • Chicken breasts:  $3.00
  • Shell pasta:  $0.50
  • Bowtie pasta:  $1.00

  Total cost to make:  $14.90

Total cost per serving:  $2.48

A meal that has healthy pasta, veggies, and meat in it, plus it’s filling and tasty… only $2.48!

AWESOME!!

  Here’s some more ideas for meals to make-ahead for a work week:

Jalapeno Cream Cheese

Jalapeno cream cheese is the best thing for some tortilla chips or crackers, or as a spread on a tasty meaty sandwich.  It’s also good just spread on toast in the morning.

Difficulty rating:  0.2  You need to be able to cut jalapenos into really small pieces and then mash it together with some cream cheese.

Here’s what you need to make Jalapeno cream cheese:

  • A brick of cream cheese, softened
  • A nice fresh jalapeno.  The longer and skinnier, the hotter

Here’s how to make it:

1.  Take the cream cheese out of its wrapping and let it sit in a bowl for about 30 minutes so it gets a bit soft.

Cream cheese waiting to be taken to another level

Cream cheese waiting to be taken to another level

2.  Now cut up the jalapeno into really small pieces  If you like your cream cheese nice and spicy, keep the seeds in.  If you’re looking for a bit of a milder flavor, throw the seeds out.

Finely diced jalapeno

Finely diced jalapeno

3.  Stir it all around until it’s well-mixed.

Yummy!!

Yummy!!

Let the flavors blend for at least an hour before you use it.  It’s really good the day after you make it!

Here’s what it costs to make  (spreads on about 7 pieces of bread):

  • Cream cheese:  $3.00
  • Jalapeno:  $0.20

Total cost to make:  $3.20

   Total cost per delicious serving:  $0.46

Not a bad price for a really tasty and spicy snack!!

I like to take a little container of this and some crackers to work for a coffee break snack.  Makes the afternoon much better!

Cheesy Creamy Tuna Casserole

It’s creamy tuna casserole with magnificent egg noodles, lots of cheese, and lots of cream.  It’s awesome.  And it’s got crunchy potato chips on top!  Make this casserole on Sunday and enjoy your Sunday dinner, and at least Monday and Tuesday lunches at work!

You can easily make this gluten-free by using your favorite gluten-free noodles instead of the egg noodles!

This recipe is not difficult – You need to be able to cook pasta, grate cheese, and use the oven.

Here’s what you need to make Cheesy Creamy Tuna Casserole:

  • A good big chunk of cheddar cheese
  • A smaller chunk of mozzarella cheese
  • 2 cans of condensed cream of mushroom soup
  • A good big handful of button mushrooms
  • 2 cans of flaked tuna
  • 1 250mL container of heavy cream (35%)
  • 1/2 of a white onion
  • 1/2 of a fresh jalapeno
  • 1 pkg of medium egg noodles
  • 1 small bag of plain salted potato chips
  • Some good sprinkles of pepper

Here’s how to make it:

1.  Put a pot of water on the stove to cook the pasta, cooking about half of the package (about 2.5 cups of uncooked noodles).  Cook the pasta according to the directions on the package, and once it’s done be sure to drain it and let it cool.  See this link if you want some tips on how to cook pasta!  

Stirring the egg noodles

Stirring the egg noodles

2.  Grate up about half of your cheddar cheese and set it aside on a small plate.  Then cut the other half of your cheddar cheese into small chunks. Put it aside on a different plate.

Grated cheddar and chunky cheddar

Grated cheddar and chunky cheddar

3.  Repeat Step Two with the mozzarella cheese, putting the grated and chunked mozzarella in with the same cheddar.

Cheddar and mozzie chunks

Cheddar and mozzie chunks

Cheddar and mozzie grated

Cheddar and mozzie grated

4.  Pour the cans of mushroom soup into a medium-sized pan on the stove on just-under-medium heat.

Cream of mushie soup

Cream of mushie soup

5.  Pour a little bit of the heavy cream into the empty soup cans then stir them around to try to pick up some of the leftover soup with the cream.  Then pour both cans of cream in with the mushroom soup in the pot.  Then sprinkle it all with pepper and stir.

Pouring some cream into the soup can

Pouring some cream into the soup can

Cream in with the soup, sprinkled with pepper

Cream in with the soup, sprinkled with pepper

6.  Open and drain both cans of tuna and then add the tuna into the soup.

Tuna in the soup!

Tuna in the soup!

7.  Slice up the mushrooms into quarters and add them into the soup.  Then stir it all up really good.

Mushroom chunks

Mushroom chunks

Mushroom chunks in the soup

Mushroom chunks in the soup

8.  Slice up the onion and add it into the soup mix.

Adding some onion

Adding some onion

9.  Finely dice up the jalapeno and stir it in.

Spicy!

Spicy!

10.  Put the oven on to 375 degrees.  Take a 9×13 inch pan and spray the bottom and sides with some non-stick spray.

11.  Mix the noodles in with the soup, a few handfuls at a time, stirring after each addition, until there’s a good amount of pasta but the mixture is still on the soupy side.

Creamy!

Creamy!

12.  Pour about half of the mixture into the greased 9×13-inch pan.

A good layer of the mixture in a 9x13 pan

A good layer of the mixture in a 9×13 pan

13.  Spread out the little chunks of cheese you cut earlier on top of the pasta.  These chunks of cheese will get all nice and melty when you bake this dish and will create what I call “Cheese Pockets.”

Future cheese pockets.  Yum!

Future cheese pockets. Yum!

14.  Spread the rest of the noodles on top of the cheese pockets.

Now the cheese pockets are hidden

Now the cheese pockets are hidden

15.  Sprinkle the casserole with the grated cheese in a nice even layer.

A nice even layer of grated mozzie and cheddar cheese on top

A nice even layer of grated mozzie and cheddar cheese on top

16.  Drizzle the remaining heavy cream on top of the casserole in a zig-zag pattern.

Creaminess added in so it's not all dry

Creaminess added in so it’s not all dry

17.  Cover the casserole and bake it for twenty minutes.  Then take it out of the oven, pull off the aluminum foil, and put it back in the oven until the cheese melts and starts to turn deliciously brown.  Then take it out of the oven and let it cool for at least 5 minutes.

Deliciously brown...

Deliciously brown…

So deliciously brown!

So deliciously brown!

18.  Meanwhile, take a nice big piece of aluminum foil and put a handful of potato chips in the middle.  Fold the aluminum up and over the chips on each side, so the chips are in a sort of an aluminum package.  Now use the palm of your hand to smush the whole thing, again and again, until the potato chips are in pieces that are smaller than the size of your pinky fingernail.

Crushing some chips - it's fun!

Crushing some chips – it’s fun!

Crushed chips

Crushed chips

19.  Spoon some of the delicious tuna casserole into your favorite dinner bowl, then divide the rest of it into your reusable lunch containers.  Then sprinkle the potato chips on top of each serving.

Enjoy!!

This is an easy, filling, and delicious meal that you can make on a lazy Sunday afternoon.  It is filling and tasty and nutritious.  Enjoy!

Here is what it costs to make (4-5 servings):

  • Cheddar cheese:  $2.00
  • Mozzarella cheese:  $1.00
  • Mushroom soup:  $2.00
  • Button mushrooms:  $1.00
  • Tuna: $3.00
  • Heavy cream:  $2.50
  • Onion:  $0.40
  • Jalapeno:  $0.08
  • Egg noodles:  $1.00
  • Pepper:  $0.01

  Total cost to make:  $13.31

   Total cost per serving:  approx.  $2.96

A tasty price for a tasty meal!  Enjoy the crunch factor that the chips provide!

Here are two more casseroles to try:

Saucy Chicken Dinner

You don’t have to be an expert to make yourself a great entree meal.  When you’re single, you tend to go for a quick microwave meal, or a toaster oven meal, or something that’s quick and easy.

But you deserve a full entree every now and then!  And guess what – they’re easy to do!

For this recipe, you just need to be able to use your oven, make minute rice, and use your stovetop.  It’s pretty easy!

Here’s what you need to make it:

  • Skinless chicken breast (I used ones with the bone in – boneless chicken is more expensive)
  • Your favorite flavor of BBQ sauce
  • 1/2 of a white onion
  • Some pre-cooked bacon
  • A little bit of honey
  • A cup of minute rice
  • A cup or two of frozen veggies

  Here’s how to make it:

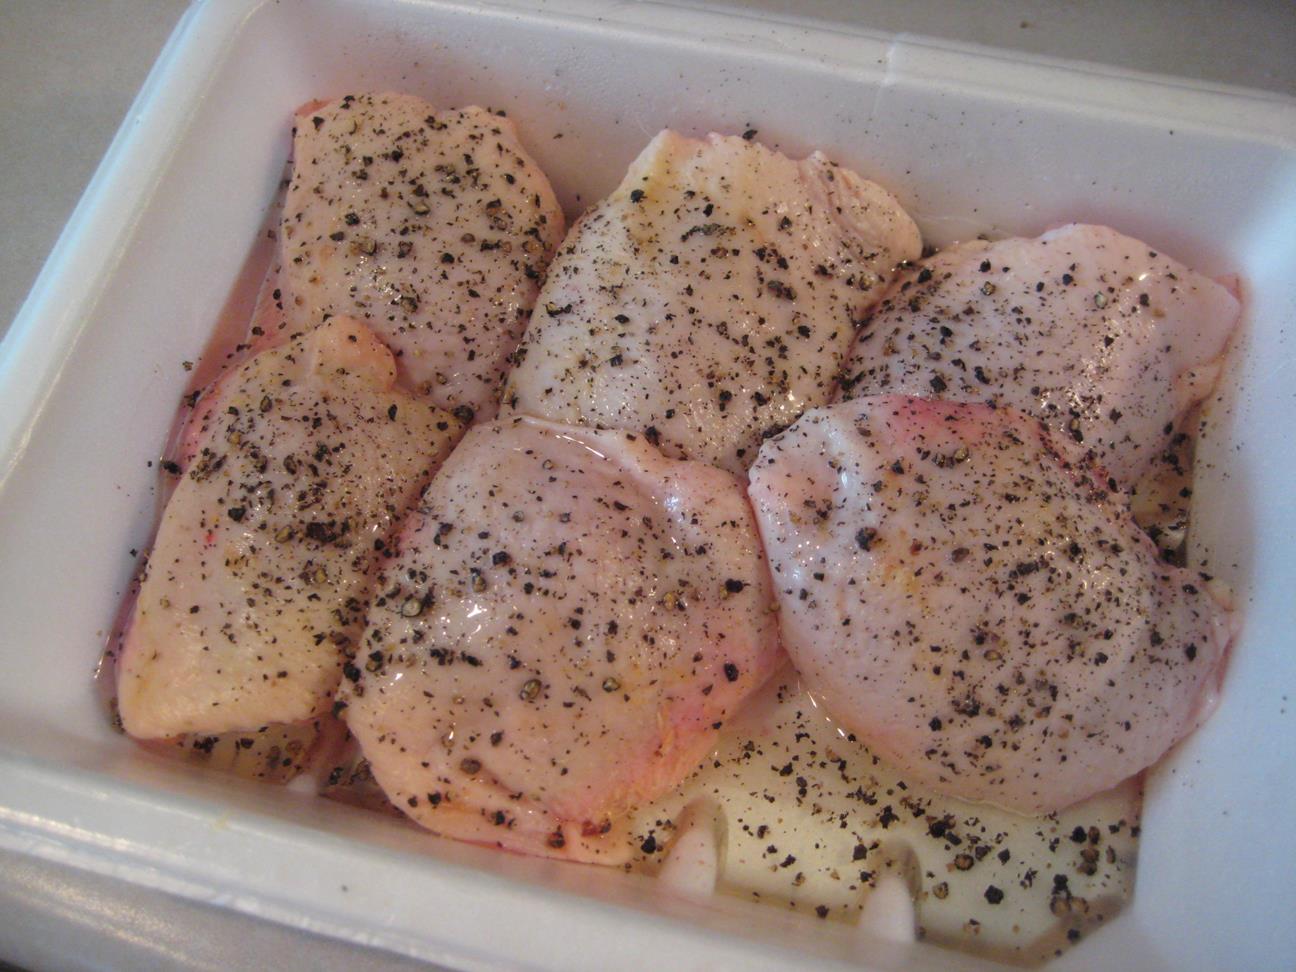
1.  The chicken takes longer than the rest of the meal to cook, so put your chicken in the oven right away.  I always use non-cooking spray, and then sprinkle each breast with some pepper before I put it in the oven.  See my guidelines for how to cook chicken here:  http://wp.me/p4HvaI-76

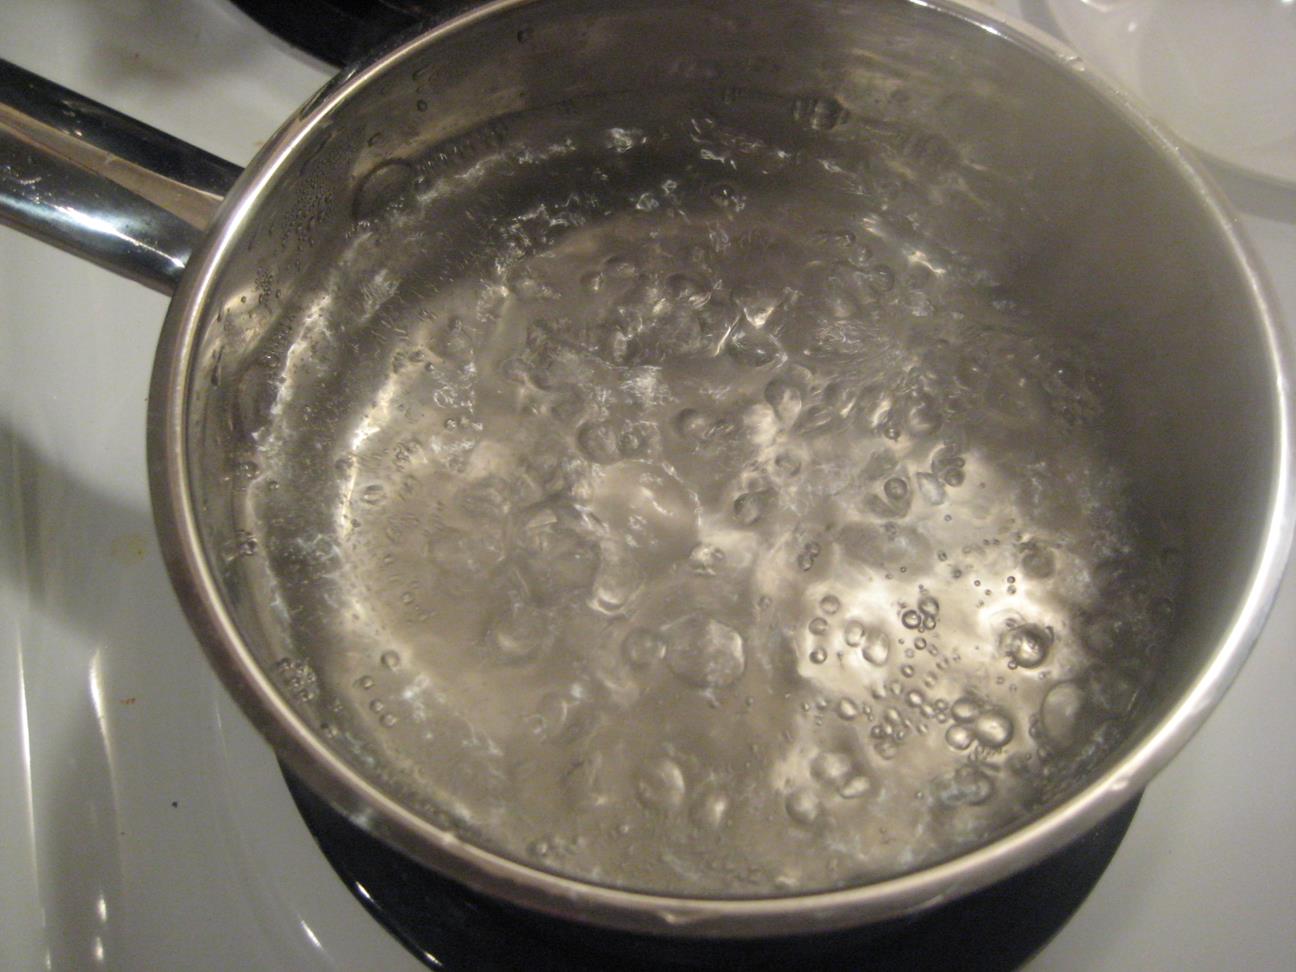
2.  While the chicken is cooking, I put a small pot of water on the stove and bring it up to a boil.  Eventually I will heat up my frozen veggies in this water.

3.  In another pot, I put in some water and salt and follow the directions on how to cook minute rice from what it says on the box.  Make as much as you want – keep in mind that rice is a great thing to take in your lunch the next day – why not make some for lunch while you’re cooking some for dinner?  It’ll keep your stomach full at work!

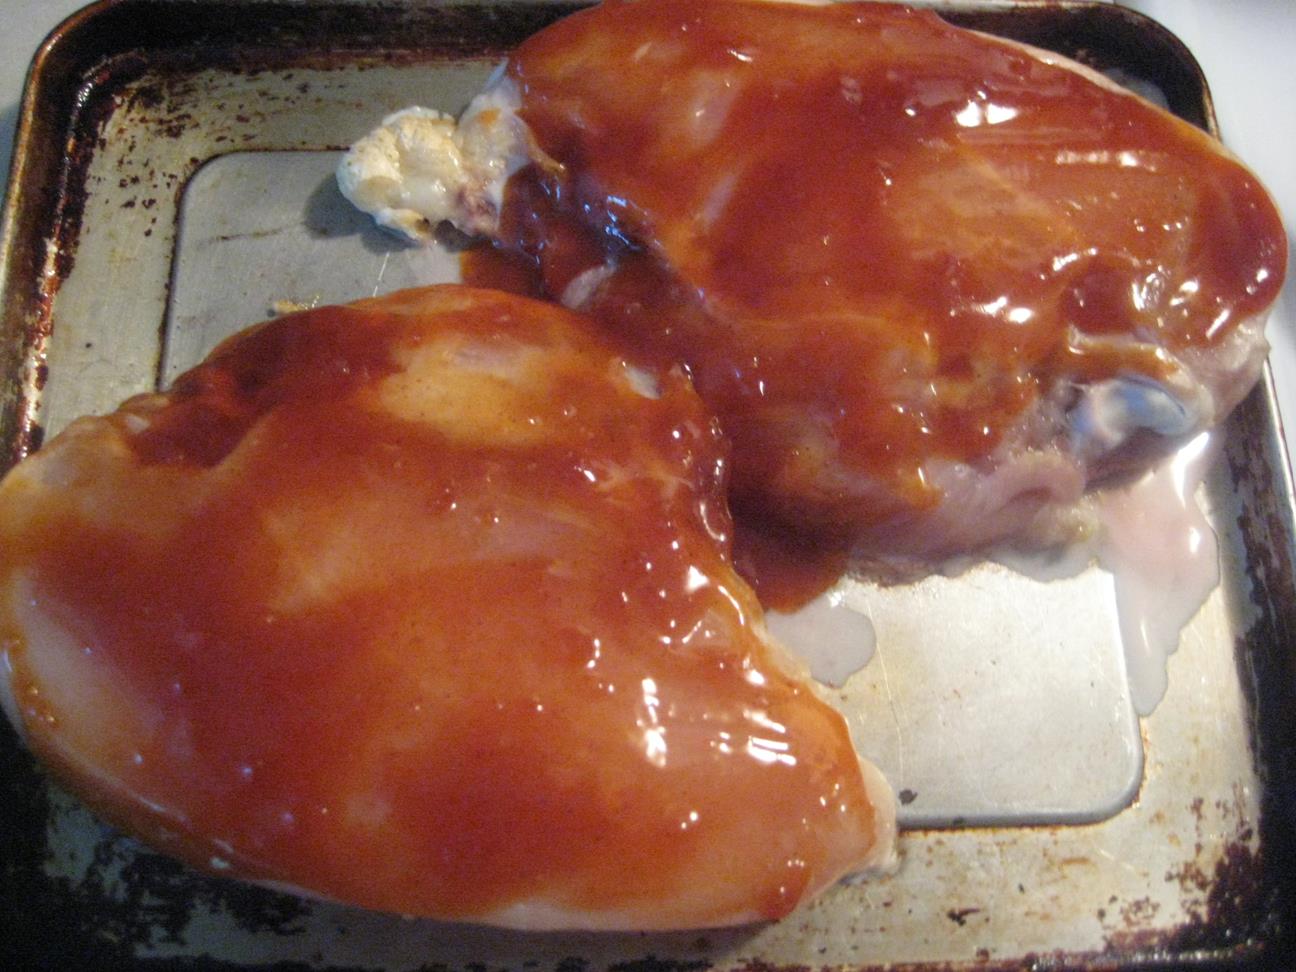
4.  Once the oven is pre-heated, pour a bit of your favorite BBQ sauce onto your chicken and smear it around so the breasts are covered.  Then put the chicken in the oven.  Set the timer for 25 minutes.

Chicken all sauced up

Chicken all sauced up

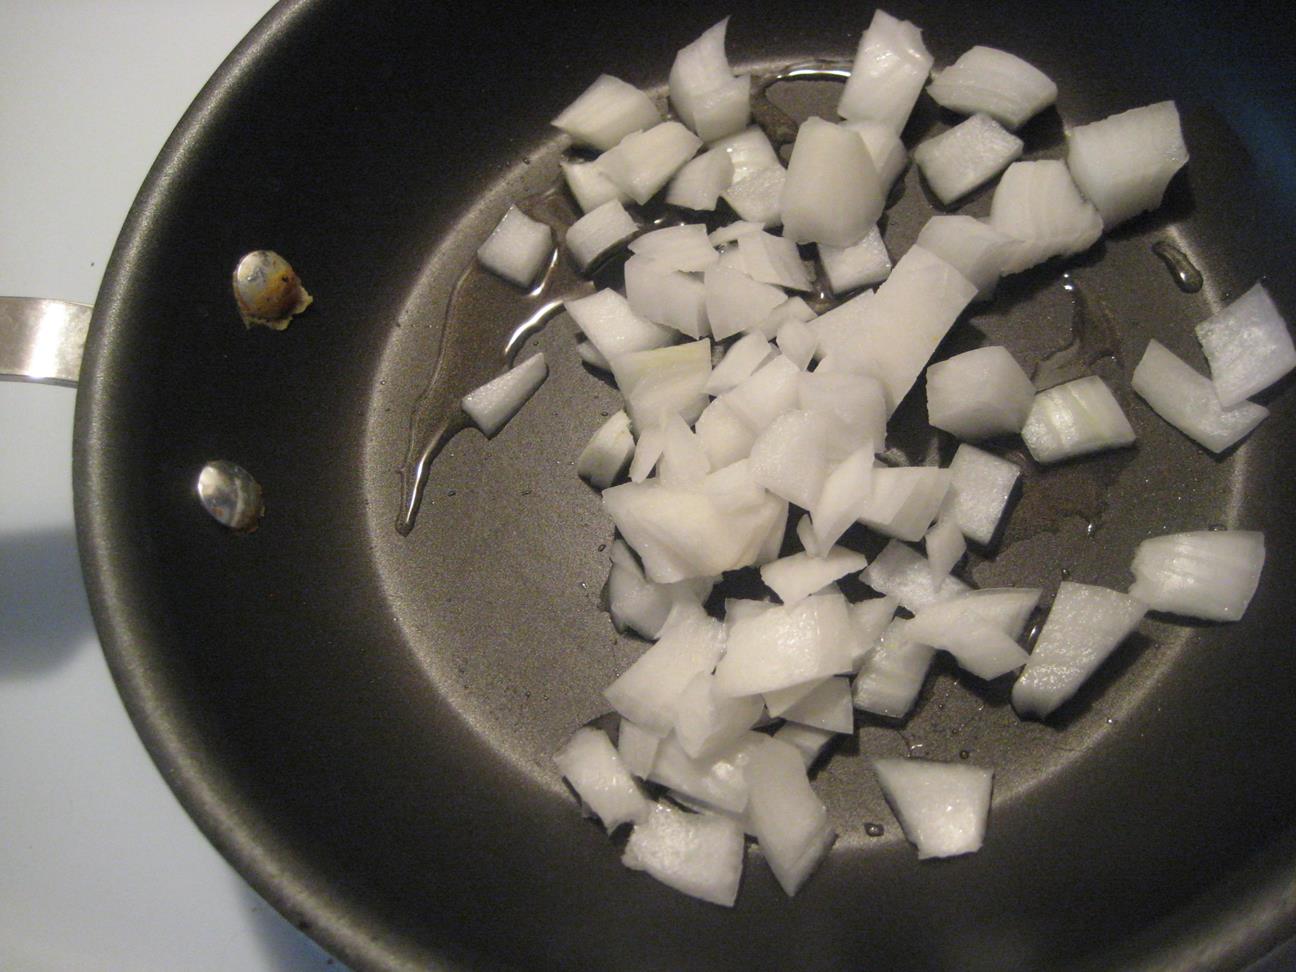
5.  After you’ve got the chicken and rice going, put a pan on the stove and put some cooking oil in it (I use canola oil usually).

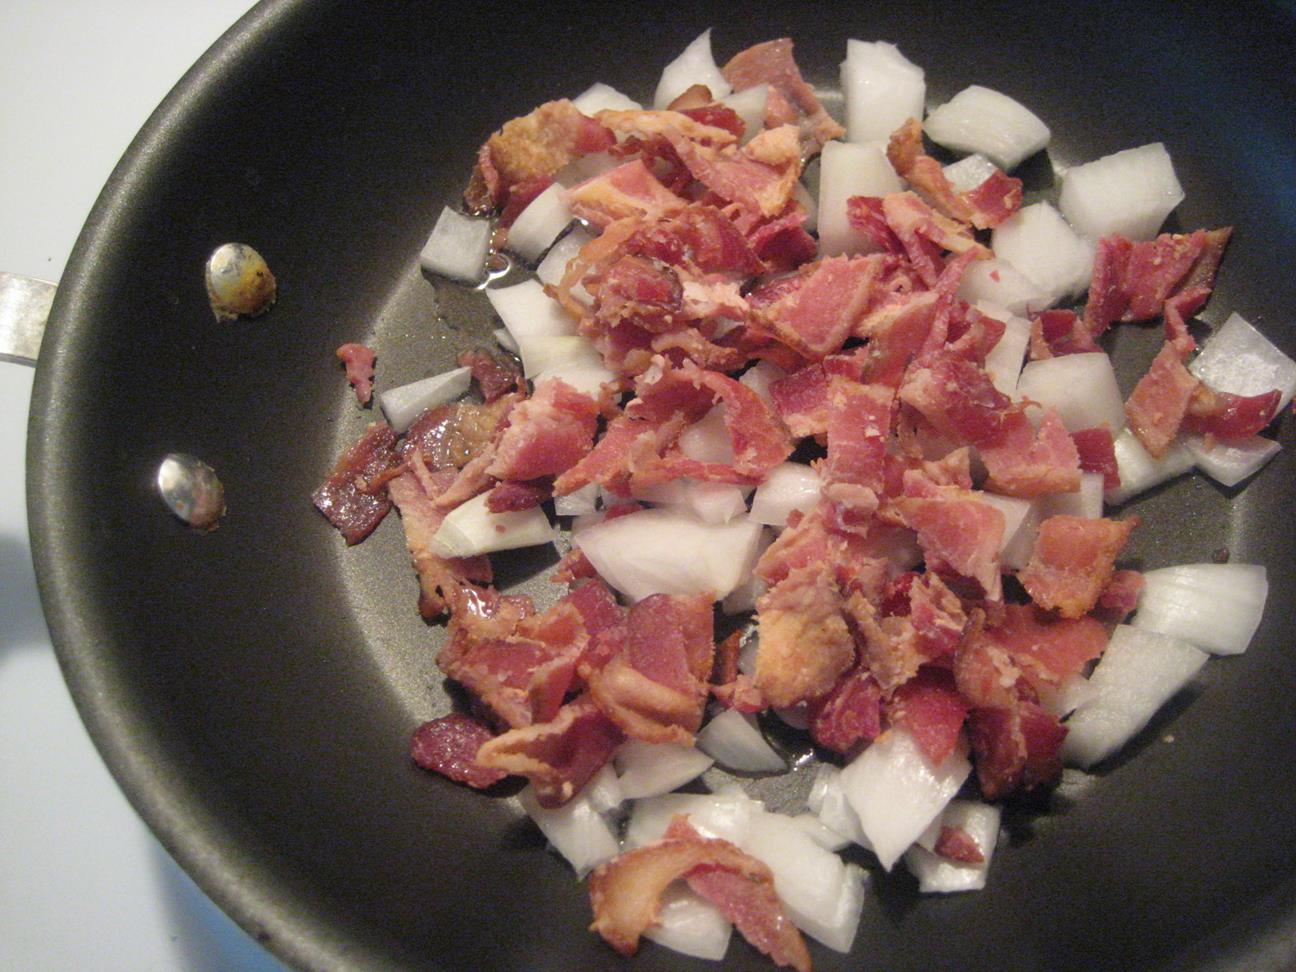
6.  Cut up your onion to the size you like (I use a big chop), and put it in with the oil so that it heats up and cooks.

Cooking some onions!

Cooking some onions!

7.  Once the onion has cooked for a few minutes, add some pre-cooked bacon.  Chop it up into bite-sized pieces first.

Onions and bacon - yum!

Onions and bacon – yum!

8.  Let the onion and bacon heat up for a bit.

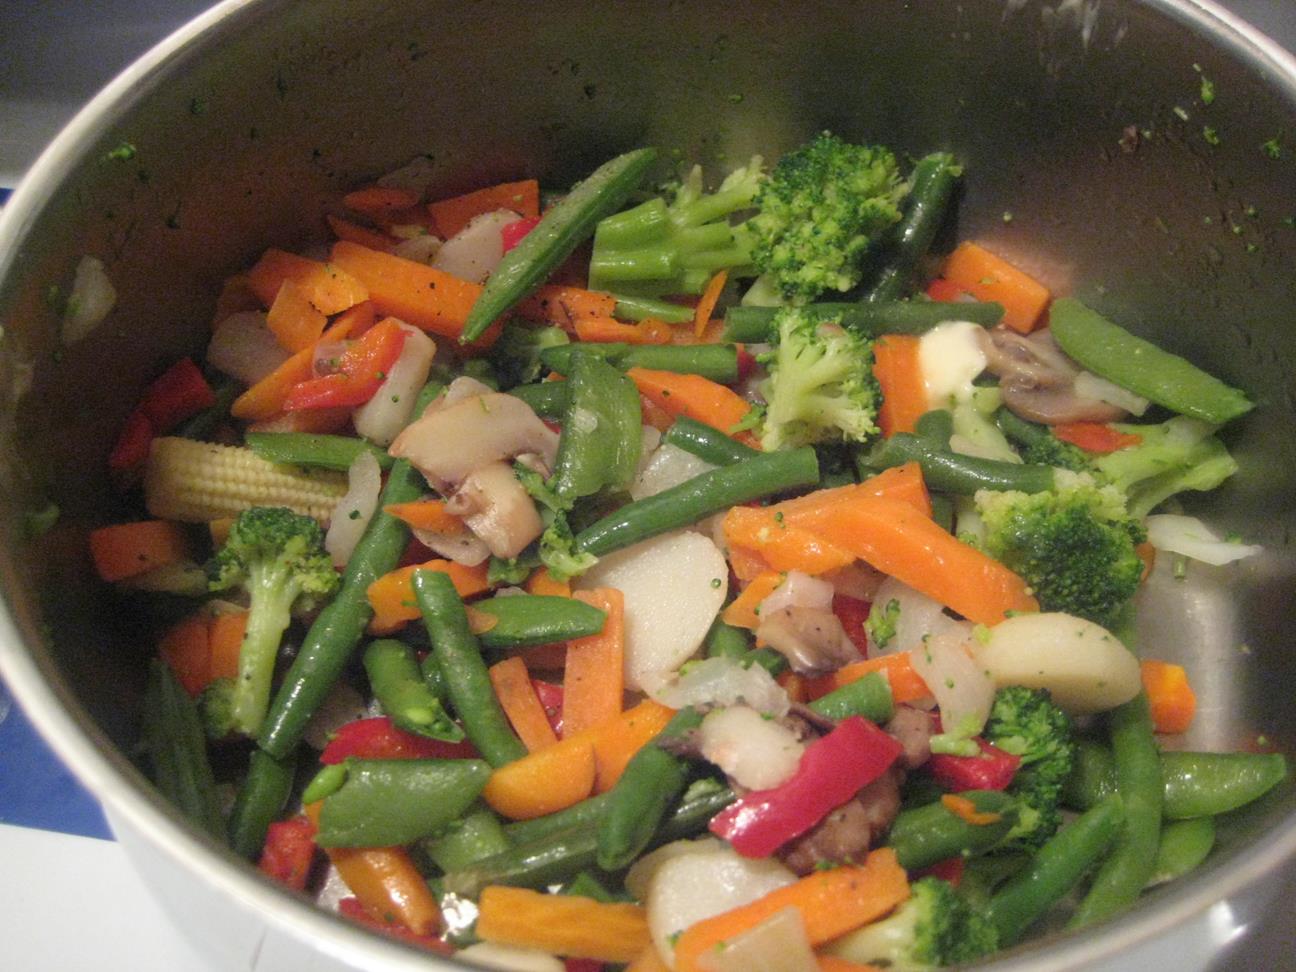
9.  Be sure to check back on your rice, chicken, and veggie stuff.  Follow the minute-rice instructions to make sure the rice is cooked properly.  It’s okay if the rice finishes cooking before everything else – it will stay warm in the pot so long as you keep the lid on.  Same with the veggies.  Once your veggie water is boiling, just add in some frozen veggies and cook until all of the veggies are nice and hot and soft.

Cooking the frozen veggies

Cooking the frozen veggies

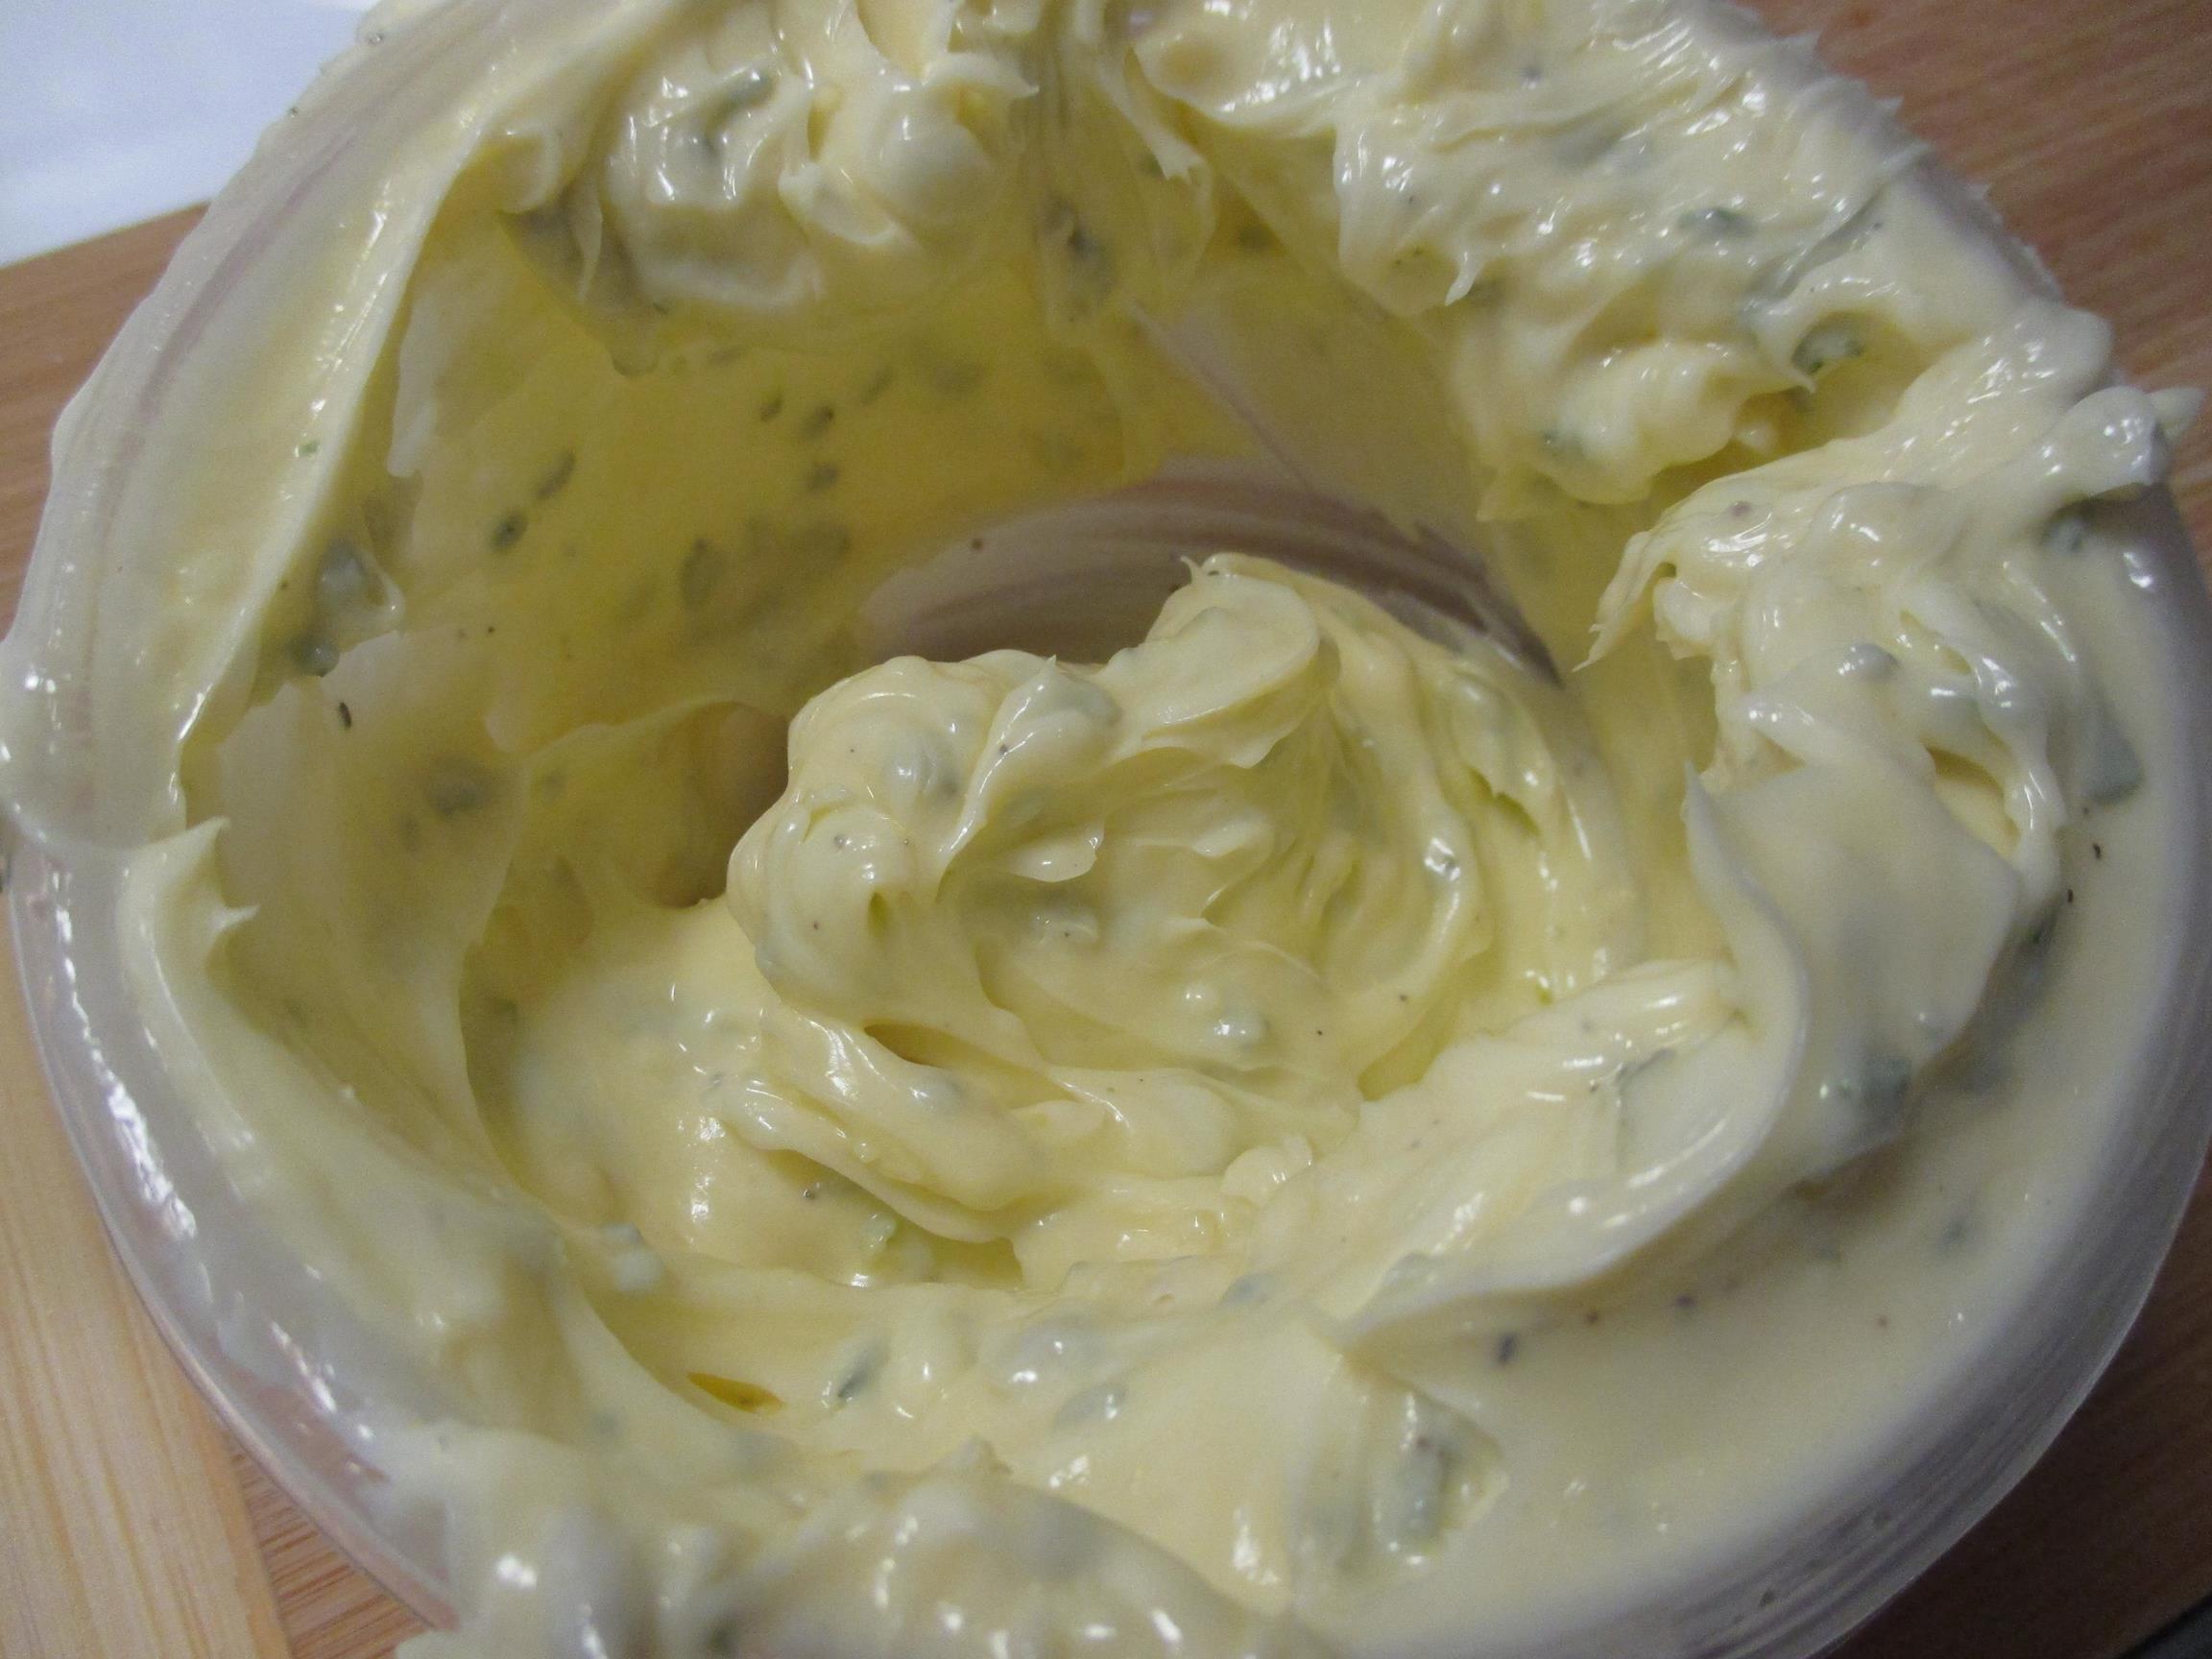
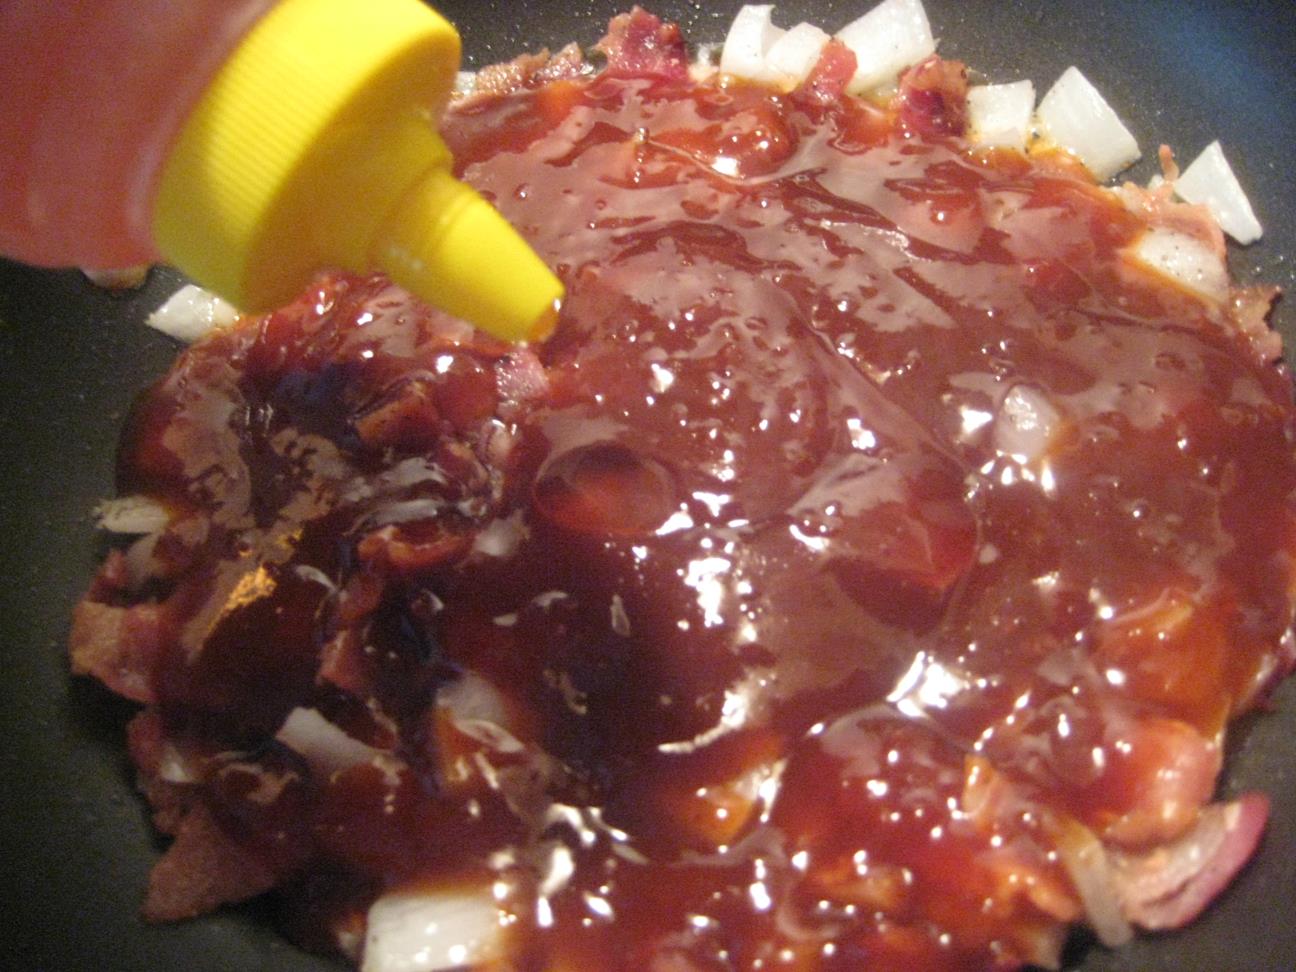
10.  Once everything’s under control, take more of your BBQ sauce and pour it in with the onions and bacon.  You want to add enough sauce so you’ll have enough to mix in with your rice, and maybe a little extra to dip your chicken in.

Making it all saucy!

Making it all saucy!

11.  If you want a crazy spin on your BBQ sauce, add a few little squeezes of honey.

Honey!

Honey!

12.  When the rice is done cooking, add it to your sauce mixture and stir it all up so it’s one delicious item.

Bacon, onions, rice, and delicious sauce... all in one pot!

Bacon, onions, rice, and delicious sauce… all in one pot!

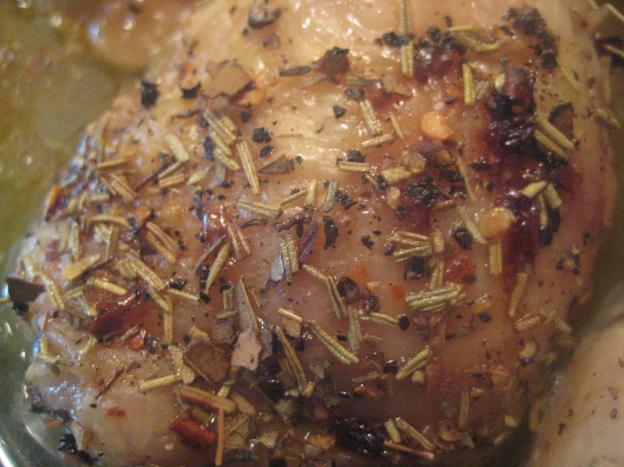
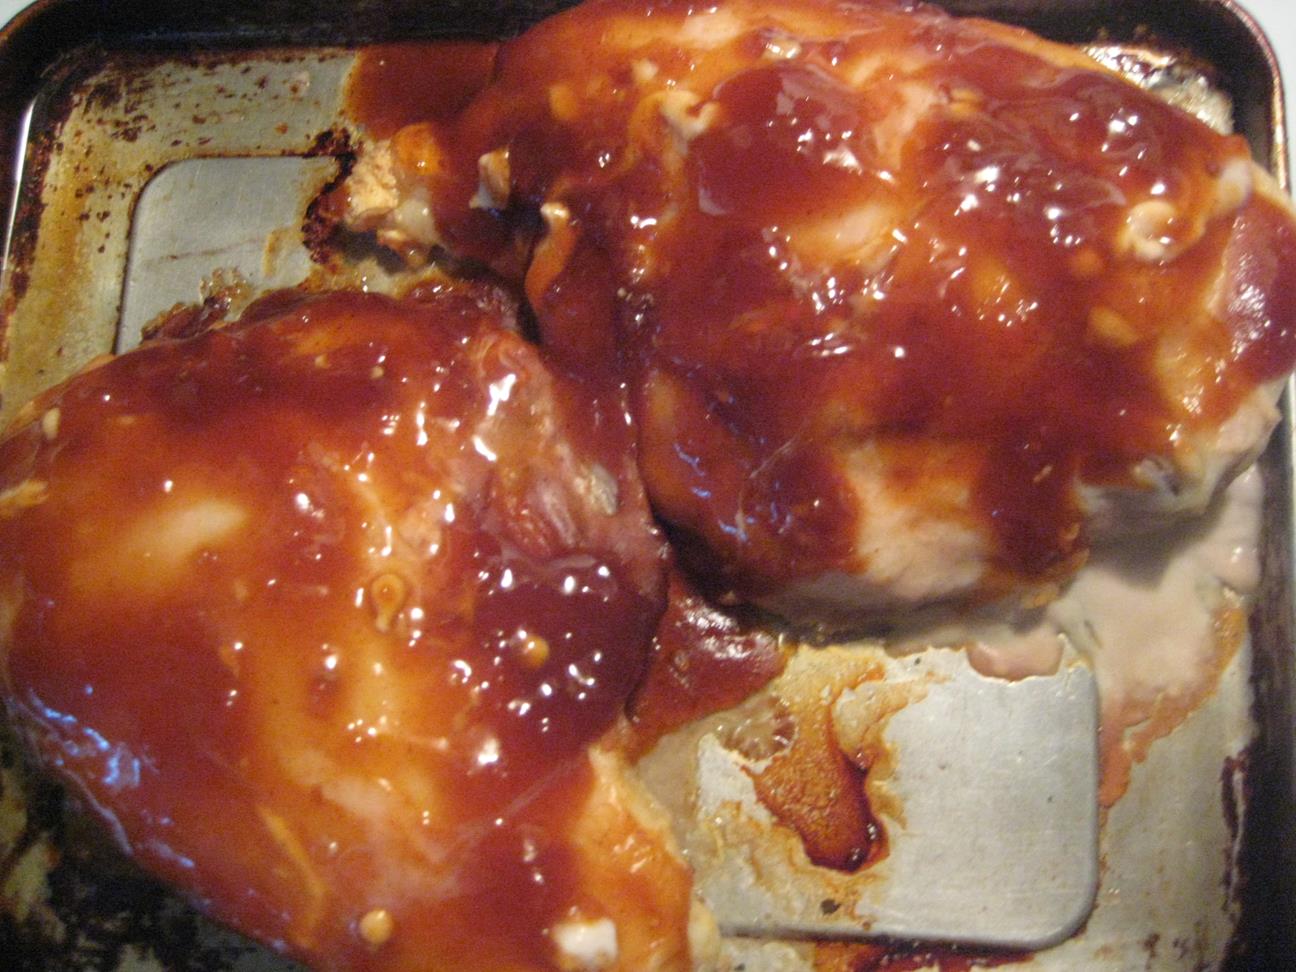
13.   When your chicken is about 5 minutes away from being done, take it out of the oven and add another layer of sauce on top.  This is to make it nice and saucy and delicious and moist!

Some more sauce added just before it's done cooking

Some more sauce added just before it’s done cooking

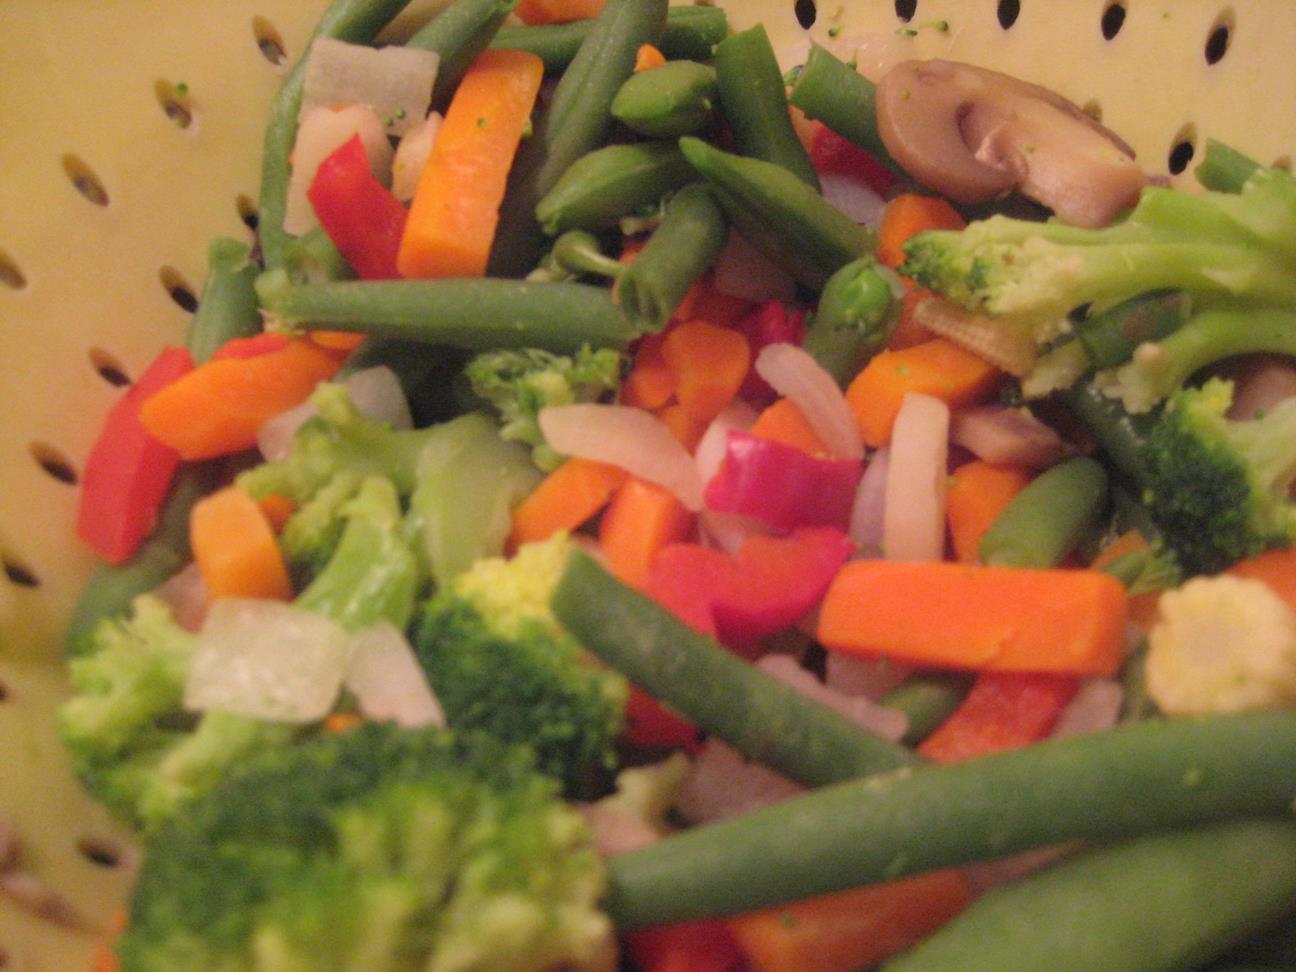
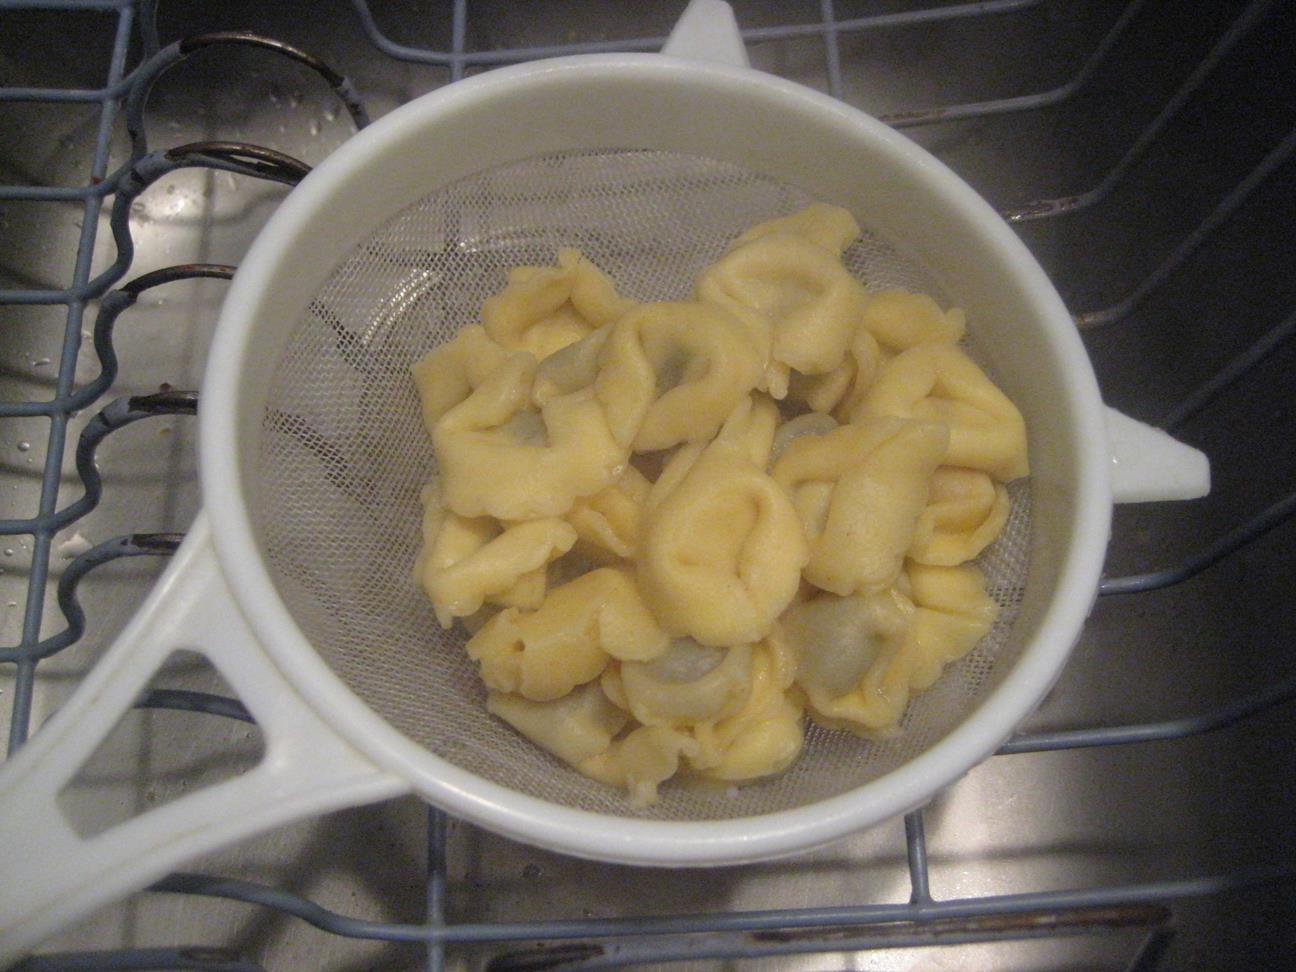
14.  Once your veggies are thoroughly cooked (if you’re not sure if they’re cooked or not, take one of the biggest pieces of veggie and bite into it – if it’s cooked the way you like it, the smaller pieces will be cooked too), drain it all in a strainer.

Draining the veggies

Draining the veggies

15.  Return the veggies to their pot and add some butter and pepper – or add whatever it is that you like on your veggies.

Veggies back in the pot with some butter melting in it

Veggies back in the pot with some butter melting in it

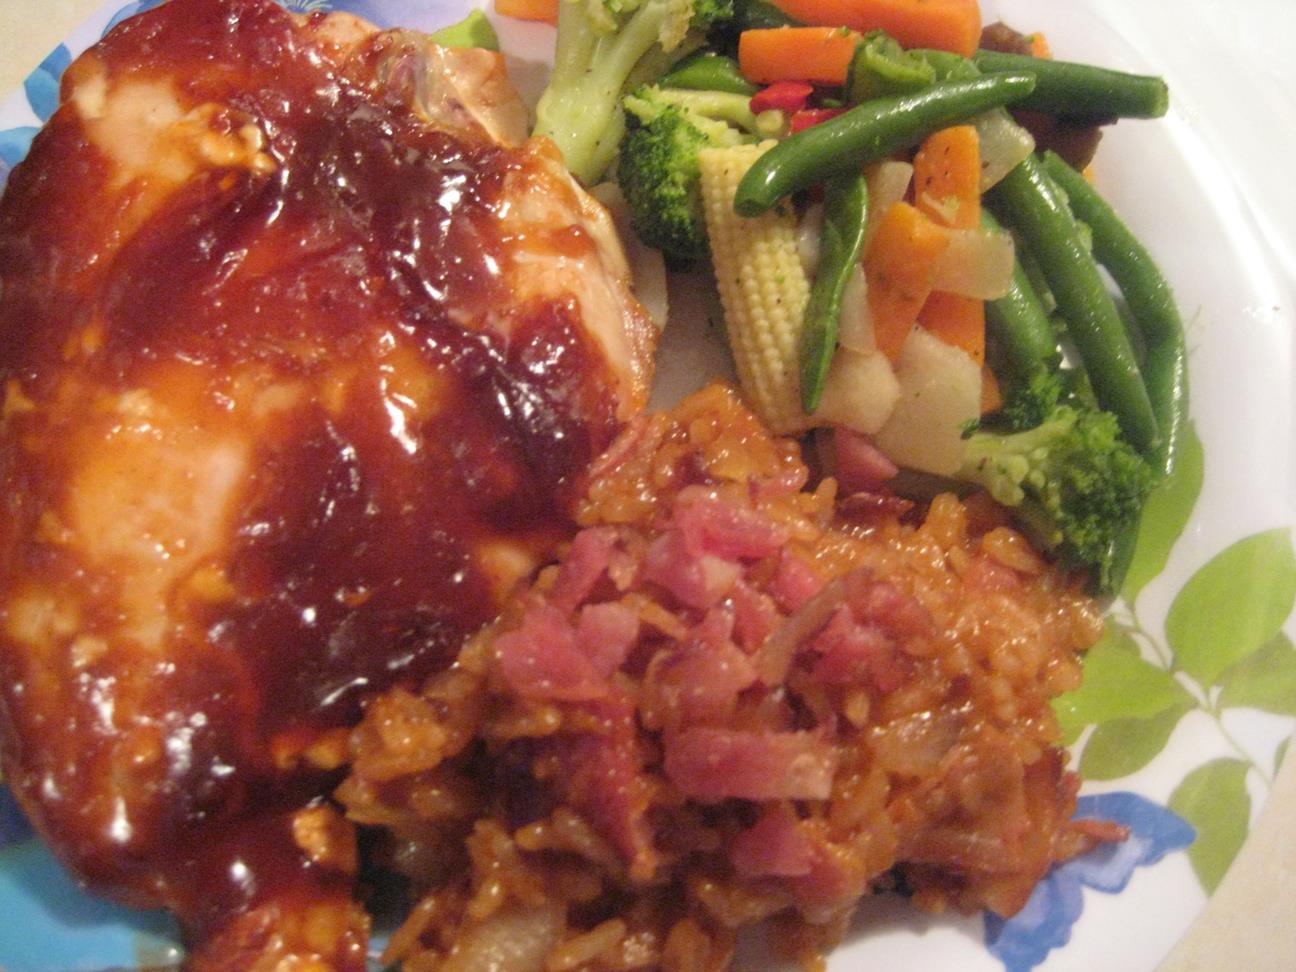
16.  Once the chicken is done, get out your dinner plate!   Put the chicken on the plate, add a few scoops of the rice mixture, and then add a scoop of the veggies.  I always save a bit of pre-cooked bacon on the side to put on the top of my rice, just so that it looks even more bacon-tastic.

Yum!!!

Yum!!!

Feel free to add other things to this meal that you like – bread & butter, a glass of wine, a nice garden salad – whatever you like!

The point is that you will benefit from keeping easy-to-make foods around.  Chicken breasts are not hard to make.  Once you know how to identify when a chicken breast is done, they’re so easy to work with.  You sprinkle them with some seasoning and the oven does the rest.  Frozen veggies make a great sidedish and all you have to do is boil water first.  Rice (especially minute-rice) is a very cheap and easy thing to make.

Learn what flavors you like and tweak the above recipe to make it the way you want.  If you don’t like BBQ sauce, use something else!  Try soya sauce, or a marinade that you got from the store, or a spicy thai sauce, whatever.

   Here’s what it costs to make (for one serving): 

  • Chicken breast:  $2.00
  • BBQ sauce:  $1.00
  • Onion:  $0.50
  • Bacon:  $1.00
  • Honey:  $0.20
  • Rice:  $0.50
  • Frozen veggies:  $0.75

  Total cost to make:   $5.95

What a great price for a full entree meal that only takes about 30 minutes to prepare!  Plus, you can double the recipe and have your lunch for work the next day!

  For more entree-type meal ideas, try one of these:

Easy Tortellini Dinner

This is a great meal for those nights where you are hungry for a good meal but you really don’t feel like cooking!

 This is one of the really, really easy ones –  you need to be able to boil water and cook pasta.  You also need to be able to stir.

Here’s what you need to make it:

  • 1 package of fresh tortellini
  • 1 jar of pasta sauce or salsa
  • Cheese

   Here’s how to make it:

1.   When fresh tortellini goes on sale at your grocery store, buy a package.  When you get home, get some freezable sandwich bags and divide the tortellini into meal-sized portions in the sandwich bags.  I put about 15 tortellini pieces into each sandwich bag, then I make sure they’re all sealed and I put them in the freezer.

2.  When you have a lazy night where you don’t feel like cooking, grab one of the bags of frozen tortellini.

3.  Put a small pot of water on the stove and bring it up to a boil.

Hot boiling water!

Hot boiling water!

4.  Once the water is rapidly boiling, pour the tortellini into the boiling water.  It needs to cook for 8 minutes.   Be sure to stir it right after you put it in, and stir it again every minute or two to make sure the pasta doesn’t stick to the pot.

Pouring in the tortellini.

Pouring in the tortellini

Stir it every minute or two

Stir it every minute or two

5.  While the pasta is cooking, slice up some cheese.  You can grate the cheese if you’d rather, but when I’m feeling lazy I don’t want to have to wash a cheese grater, so I just make a few slices of cheese with a knife.

Cheese slices. Yum!

Cheese slices. Yum!

6.  When the pasta is cooked, drain it in the sink.

Draining the tortellini

Draining the tortellini

7.  While the tortellini is draining, put the pot you cooked it in back on the stove on the same burner.  Turn the heat down to low or turn it off completely.  Then pour the pasta sauce or salsa into the pot and stir it so that it covers the bottom of the pan.  The pan is still hot so the sauce will warm up even if the stove is off.  Use as much salsa or sauce as you like!

Salsa getting warmed up

Salsa getting warmed up

8.  Once the sauce is warm, add the tortellini back in and stir it up.

Looking tasty!

Looking tasty!

9.  Add the cheese.

Cheese!

Cheese!

10.  Stir it up again and then pour it into your favorite dinner bowl.   It’s ready to eat!!

Delicious!

Delicious!

There, your dinner is ready!    This simple but tasty meal is filling and healthy and it only takes 10 minutes to make!   Hate washing dirty dishes?  This only uses one pot, one knife, one bowl, and a fork.  That’s it!  If you’re super-lazy, you can eat the pasta right out of the pot!  Just be careful, the bottom of the pot will be hot.

  Here’s what it costs to make: 

  • 1 portion of frozen tortellini:  $0.75
  • Salsa or pasta sauce:  $0.40
  • Cheese:  $0.45

  Total cost to make:  $1.60

What a cheap, easy, and fast meal!!

Close-up of the deliciousness!

Close-up of the deliciousness!

There are plenty of other tasty, quick, and cheap meal ideas on this website!  Try one of these:

Bruschetta

Bruschetta is a great summer treat!  It’s light and refreshing.  Basically it’s a unique fresh burst of tomato on top of an old favorite – garlic bread.

You don’t have to be a chef to make this!  All you need is the patience to dice a lot of tomatoes into fine pieces. The rest is super easy!

  Here’s what you need to make it: 

  • About five roma tomatoes, finely diced (see http://wp.me/p4HvaI-3Y)
  • A little bit of finely diced onion
  • A little bit of finely diced jalapeno
  • Two garlic gloves, minced
  • About a quarter cup of oil (olive oil is best if you have it)
  • A good handful of grated cheese
  • Bread (your choice – you can use sliced bread, you can use sliced buns, you can use a bagel, you can use a sliced baguette – whatever you want)

Here’s how to make it: 

1.  Take your finely diced tomatoes and put them in a mixing bowl.

Finely diced tomatoes

Finely diced tomatoes

2.  Add your chopped onion and jalapeno then mix it all together.  I also add some fresh-cracked black pepper.

Basic tasty bruschetta ingredients

Basic tasty bruschetta ingredients

Mmmm! Looking good already!

Mmmm! Looking good already!

3.  Put the minced garlic in a small bowl or cup.

Garlic

Garlic in a glass bowl

4.  Add the cooking oil and more fresh-cracked black pepper if you like it.  Use a fork to mix it all around.

Yum!

Yum!

5.  Pour the oil mixture on the tomatoes and stir it all up.  Stir gently so as not to bruise the tomatoes.

All stirred and yummy!

All stirred and yummy!

6.  Now take the mixture and put in the fridge for a couple of hours for the flavors to mix.  You can skip this step if you don’t have time, but it does help the flavors blend.

7.  Take your sliced bread and put it on a baking sheet to toast it.

Ready to toast!

Ready to toast!

8.  Turn on your toaster oven to 400 degrees.  Toast the bread as the oven is heating up.

9.  When the bread is toasted to the point that it’s stiff but not browned, take it out of the oven.  Now put a spoonful of the tomato mixture onto each piece.  You don’t want to put too much on each piece or it will fall off as you try to eat it.  People would prefer a snack that’s easy to eat over one that has chunks of stuff falling on their clothes.

Just a thin layer of delicious mixture

Just a thin layer of delicious mixture

10.  Now sprinkle each piece with some grated cheese.

Ready to cook!

Ready to cook!

11.  Cook them in the oven until the cheese is nice and melted, usually about 10 minutes.

Amazing snack!

Amazing snack!

If you’re eating these alone, knock yourself out.  If you’re serving them to some guests, bring a few napkins when you serve them.  Your guests will love your fresh tasty bruschetta!

Look at the glory

Look at the glory

  Here’s what it costs to make:

  • Tomatoes:  $1.00
  • Onion:  $0.25
  • Jalapeno:  $.15
  • Garlic:  $0.25
  • Oil:  $0.35
  • Cheese:  $1.00
  • Bread  $1.50

  Total cost to make:  $4.50   

This recipe made enough for two people, probably even 3.   So that’s $1.50 each to feed you and two buddies!  Have some people over for tea and bruschetta and some nice conversation.  Awesome!

Need some other ideas for quick, easy, and cheap meals to serve to guests?  Check these out!

Thriller Quesadillas

These babies make single life worth living.  They’re cheap, reasonably healthy, and just amazingly good.

You can make Thriller Quesadillas even if you’re not a very good cook.  If you can put a chicken breast in the oven for 25 minutes, and cut up some veggies, and grate cheese, then you can make these!

Here’s what you need to make Thriller Quesadillas:

  • 2 flour tortillas
  • 1/6 of a green pepper
  • 1/4 of a fresh jalapeno
  • 1/6 of an onion
  • 1/2 a Roma tomato
  • 1 chicken breast
  • 1 cup of salsa
  • 1 cup of cheese

Here’s how to make them:

1.  Cook the chicken breast.  Once it’s cooked, leave it aside to let it cool down.

2.  Heat your oven up to 400 degrees.

3.   Dice up the green pepper.  Put the dices in a bowl.

4.  Dice up the jalapeno and put the pieces in the bowl with the green peppers.

5.  Dice up the onion and put the pieces in the same bowl.

6.  Dice up the tomato and put the pieces in with the other veggies.

7.  Mix all the veggies up with a spoon until they’re all nice and mixed.

8.  Take 2 tortilla wraps and lay them on a baking sheet.   Put them side by side, with about half of each of them being folded up into your hand, like in the picture below:

Tortillas held so about half of them are together in the middle

Tortillas held so about half of them are together in the middle

9.  Spread some delicious cheese on the bottom part of the tortillas.

Cheesy!

Cheesy!

10.  Now sprinkle each half with the chopped veggies.  Yum!

Getting yummier!

Getting yummier!

11.  Now slice up the chicken and spread the slices out on top of the veggies.

Even yummier!

Even yummier!

12.  Now put a few good globs of salsa on top, just like in this picture:

Mmm!  Now featuring salsa!

Mmm! Now featuring salsa!

Here’s a close-up of how awesome it looks at this stage:

Wow.

Wow.

13.  Now sprinkle cheese all over the other stuff.  Put as much cheese on as you like.

Gettin' cheesy!

Gettin’ cheesy!

14.  Now fold the top halves over the bottom halves to make two separate quesadilla halves.

Awesome!

Awesome!

15.  This step is very important!  When some of the ingredients spill out of the quesadilla and lay on the baking sheet, leave them alone!!!  Bake them along with the quesadilla and then snack on them throughout the cooking process.  Cheese run-off… you all know what I’m talking about.

Thou shalt be a great piece of run-off....

Thou shalt be a great piece of run-off….

16.  Now cook the quesadillas for about 8 minutes.  Then take them out, flip them both over, and cook them on the other side for maybe 7 minutes.   Just keep looking at them every few minutes.  Once the top gets all nice and browned and toasty, it’s done!

Oh yeeeeah!!

Oh yeeeeah!!

17.  Let the quesadilla rest for about five minutes so the cheese has time to settle.  It makes it way more easier to cut, and makes it less messy to eat.  Then cut it into pieces like this:

Cut each half into four pieces, from the center out to the edges

Cut each half into four pieces, from the center out to the edges

Here’s what your quesadilla should look like from an amazing side view:

Amazing side view

Amazing side view

Here’s an even cheesier side view:

Ohhhhh baby!!

Ohhhhh baby!!

Here’s another mouth-watering shot:

Mmmmm!!!

Mmmmm!!!

Arrange the slices all prettily on a plate and then dig in!  Enjoy!!

Awesome dinner!!

Awesome dinner!!

  Here’s what it cost to make: 

  • Flour tortillas:  $0.80
  • Cheese:  $1.50
  • Salsa:  $0.60
  • Veggies:  $1.00
  • Chicken breast:  $1.50

Total cost to make:  $5.40

Note that the recipe above feeds me for dinner, as well as a few leftover quesadilla slices to go in my lunch tomorrow.    So that’s about $3.60 for an amazing quesadilla dinner, and about $1.80 for the majority of my lunch the next day.  That’s a pretty decent deal, and it’s tastes amazing!!!

Thriller Quesadillas

Thriller Quesadillas

Hold on, there’s a lot more quick and tasty meals!